Gentics CMS supports Keycloak versions 19.x to 26.×.
1 Server side configuration
Activate the Keycloak feature and add configuration of the keycloak server as well as for user creation callbacks and initial groups:
feature:
  keycloak: true
  keycloak_signout: true
keycloak:
  auth-server-url: https://your.keycloak.instance/
  realm: CMP
  resource: "cms"
  # keys: "keycloak/keys.json"
  user_created_callback: your.companyname.custom.SsoUserCreated
  sync_groups: true
  init_groups:
    roles.realm.realm-role-1: RealmRoleGroup1
    roles.realm.realm-role-2:
      - RealmRoleGroup2a
      - RealmRoleGroup2b
    roles.realm.realm-role-3:
      - RealmRoleGroup1
      - RealmRoleGroupX
      - group: RealmRoleGroup3
        nodes: Node 3
    roles.resource.cms.cms-role:
      - group: CmsRoleGroup
        nodes:
          - Node 1
          - 4488.c0767dce-f8fd-11ef-8735-769f09e19595
          - NonExistantNode
  show_sso_button: true
Changes in the configuration, especially activation/deactivation of the feature itself, will only become effective when the CMS server is restarted.
1.1 Configuration options
The following configuration entries define how SSO login via Keycloak is handled.
auth-server-url,realmandresource: These entries correspond exactly to the respective fields in thekeycloak.jsonyou can generate in the Keycloak admin front-end.keys: If this is set to the relative path to a .json file (relativ to the conf path) containing the keys, which were downloaded via the URLhttps://your.keycloak.instance/realms/[realmname]/protocol/openid-connect/certs, those keys will be used to validate the access tokens. Otherwise, the CMS server will try to download the keys directly from keycloak.user_created_callback: This can be set to the full class name of a callback implementing SsoUserCreatedCallback. When a new user is created by the SSO process, the callback will be executed with the data of the new user. Theattributesmap contains the following information:firstname: the “given name” claim in the access tokenlastname: the “family name” claim in the access tokenemail: the “email” claim in the access tokenroles: a map containingrealm: the list of realm roles for the userresource: a mapping from resource names to the respective resource roles for the user
sync_groups: Whether an already existing users groups should be checked everytime an SSO login is performed. If the attributes of the user changed (e.g. the assigned roles in Keycloak), the groups of the user will be changed to match the new attributes.init_groups: Mappings from user attributes to lists of CMS user groups. In the example above, this means that ifroles.realm.realm-role-1can be resolved in the user attributes, the created user will be assigned to the groupRealmRoleGroup1. The groups may be a single group name or a list of groups. In a list of groups each entry may be a single string which must be the name of the group, or a mapping with the keysgroupandnodeswhich hava the group name and a list of nodes to which the group assignment is restricted respectively. Nodes may be specified by their name or their global ID. Non-existing groups and nodes will produce a warning in the logs, but will otherwiese be ignored.show_sso_button: When this is set to `true` (see example configuration above), the login masks for the editor-ui and admin-ui will show the login mask with an additional “Login with SSO” button which will redirect to Keycloak. When the setting is `false` (which is the default) the UIs will immediately redirect to the Keycloak login mask.
For security reasons, it is not possible to add users to groups 1 or 2.
2 Required/Supported claims in the JWT
When using Keycloak, the CMS will access the following claims in the JWT:
| Name | Description | Required |
|---|---|---|
| preferred_username | Mapped to the login name of the user | yes |
| given_name | Mapped to the first name of the user | no |
| family_name | Mapped to the last name of the user | no |
| Mapped to the email address of the user | no | |
| realm_access | Can be used for mapping roles to CMS groups | no |
| resource_access | Can be used for mapping roles to CMS groups | no |
3 Using an Identity Provider
When using an identity provider the following two settings in the advanced OpenID Connect settings are important to prevent unwanted redirect behavior:
- “Prompt”: Set to “Select account”
- “Accepts prompt=none forward from client”: Set to “Off”

4 Setup Content Security Policy
The Administrator User Interface requires some additional settings in Keycloak, to work as expected. Update the “Content Security Policy” of your Keycloak realm:
- Select your Realm in the top left corner
- Select the tab “Realm Settings” in the “Configure” category on the left sidebar
- Select the tab “Security Defenses” on the top bar
Adopt the “Content-Security-Policy” to allow the embedding from your CMS installation host:
frame-src 'self'; frame-ancestors 'self'; object-src 'none';
frame-src 'self'; frame-ancestors 'self' https://yourcmshost.tld; object-src 'none';
5 Circumvent Single Sign-on
It can usefull to not use the single sign process although it is enabled. The single sign on process will be skipped and users will be forwarded to the login form when the url parameter skip-sso is present. Example: https://yourcmshost.tld/editor/?skip-sso
6 Single Sign Out
By activating the feature
feature:
  keycloak_signout: true
users will automatically be logged out from Keycloak, if they log out from the CMS using the Editor User Interface or Administration User Interface.
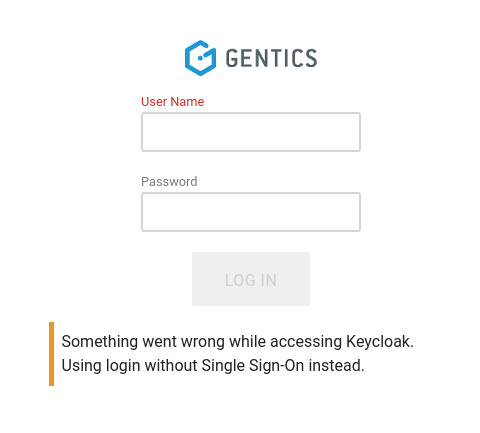
7 Missing Keycloak
When Keycloak is configured but currently not available, the CMS login will show a message that Single-Sign-On is currently not available.